こんにちは(@t_kun_kamakiri)
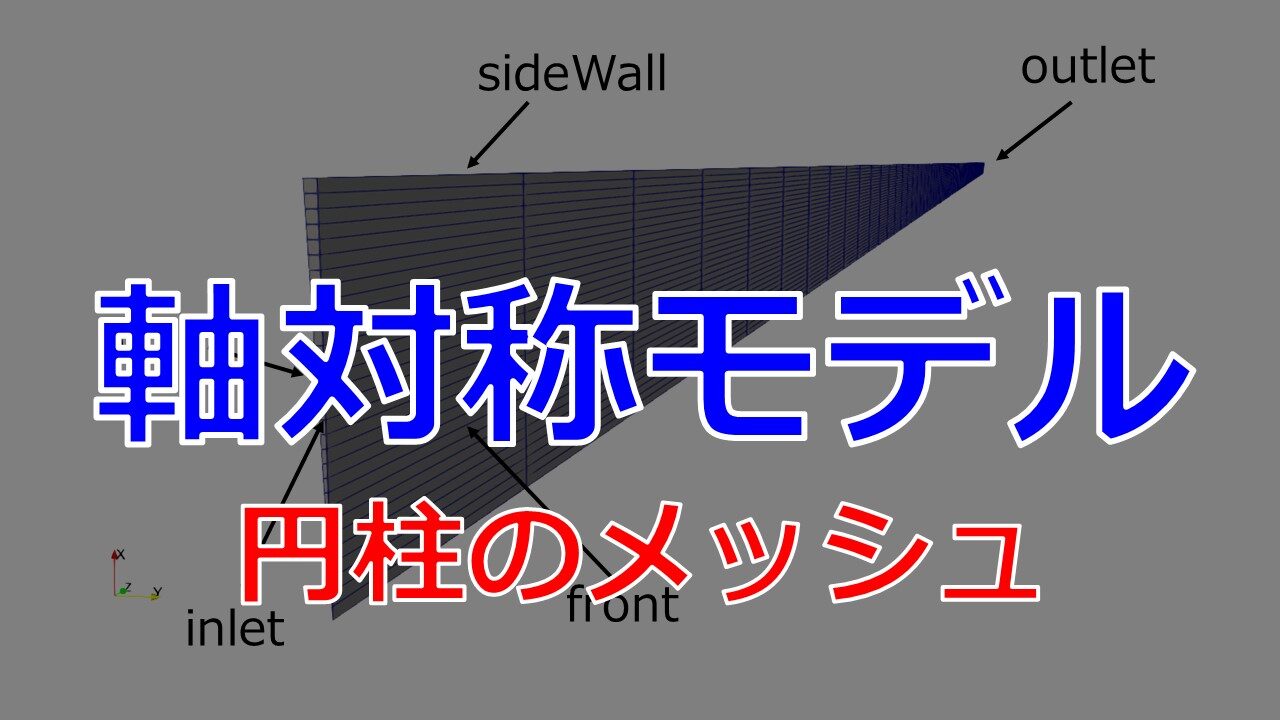
本記事はOpenFOAMでの円柱の軸対称モデルの作り方を紹介します。
以下の記事で円柱内流れを解析するために色々な円柱のメッシュ作成方法を紹介しました。
blockMesh

snappyHexMesh

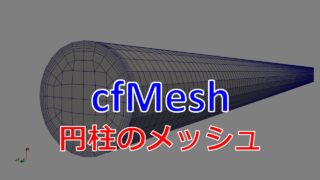
cfMesh

しかし、円柱なら360°ぐるっと回転対称なので軸対称のモデルで行うことができます。
今回作るのは以下のようなモデルです。

【使用環境】
OpenFOAM-v2012(WSL2)
チュートリアルをコピーする
以下のコマンドで適当なチュートリアルをコピーします。
|
1 |
cp -r $FOAM_TUTORIALS/incompressible/simpleFoam/pitzDaily Cylinder_axialSymmetr |
フォルダを移動します。
|
1 |
cd Cylinder_axialSymmetry |
フォルダ移動できたらベースのメッシュを作っていきましょう。
ベースのメッシュ生成(blockMesh)
system/blockMeshDictで軸対称モデルのベースになるモデルを作成します。
system/blockMeshDict
|
1 2 3 4 5 6 7 8 9 10 11 12 13 14 15 16 17 18 19 20 21 22 23 24 25 26 27 28 29 30 31 32 33 34 35 36 37 38 39 40 41 42 43 44 45 46 47 48 49 50 51 52 53 54 55 56 57 58 59 60 61 62 63 64 65 66 67 68 69 70 71 72 73 74 75 76 77 78 79 80 81 82 83 84 85 86 87 88 89 90 91 92 93 94 95 96 97 98 99 100 101 102 103 104 105 106 107 108 109 110 111 112 113 114 115 116 117 118 119 |
/*--------------------------------*- C++ -*----------------------------------*\ | ========= | | | \\ / F ield | OpenFOAM: The Open Source CFD Toolbox | | \\ / O peration | Version: v2012 | | \\ / A nd | Website: www.openfoam.com | | \\/ M anipulation | | \*---------------------------------------------------------------------------*/ FoamFile { version 2.0; format ascii; class dictionary; object blockMeshDict; } // * * * * * * * * * * * * * * * * * * * * * * * * * * * * * * * * * * * * * // scale 0.001; xmin 0; xmax 10; ymin 0; ymax 10; zmin 0; zmax 1200; //xcells 22; //ycells 4; //zcells 4; deltax 0.1; //0.05 deltay 0.1; //0.05 deltaz 0.1; //0.05 lx #calc "($xmax) - ($xmin)"; ly #calc "($ymax) - ($ymin)"; lz #calc "($zmax) - ($zmin)"; xcells #calc "round($lx / $deltax)"; ycells #calc "round($ly / $deltay)"; zcells #calc "round($lz / $deltaz)"; vertices ( ($xmin $ymin $zmin) ($xmax $ymin $zmin) ($xmax $ymax $zmin) ($xmin $ymax $zmin) ($xmin $ymin $zmax) ($xmax $ymin $zmax) ($xmax $ymax $zmax) ($xmin $ymax $zmax) ); blocks ( hex (0 1 2 3 4 5 6 7) (30 1 100) simpleGrading (1 0.1 1) ); edges ( ); boundary ( inlet { type patch; faces ( (0 3 2 1) ); } outlet { type patch; faces ( (4 5 6 7) ); } sideWall { type wall; faces ( (2 6 5 1) ); } bottom { type wall; faces ( (0 4 7 3) ); } front { type empty; faces ( (3 7 6 2) ); } back { type empty; faces ( (0 1 5 4) ); } ); mergePatchPairs ( ); // ************************************************************************* // |
blockMeshを実行します。
|
1 |
blockMesh |
ParaViewで結果を確認します。
メッシュはy方向は1層だけにしています。


次の工程でbottomを距離0にして扇形の形状にします。
扇形形状にする(extrudeMeshDict)
extrudeMeshDictをどこかからコピーしてくる。
|
1 |
find $FOAM_TUTORIALS -name "extrudeMeshDict" |
以下の候補が出てきます。
|
1 2 3 4 5 6 7 8 9 |
/opt/OpenFOAM/OpenFOAM-v2012/tutorials/multiphase/compressibleInterFoam/laminar/climbingRod/system/extrudeMeshDict /opt/OpenFOAM/OpenFOAM-v2012/tutorials/multiphase/interFoam/RAS/waterChannel/system/extrudeMeshDict /opt/OpenFOAM/OpenFOAM-v2012/tutorials/multiphase/compressibleInterIsoFoam/laminar/climbingRod/system/extrudeMeshDict /opt/OpenFOAM/OpenFOAM-v2012/tutorials/incompressible/pimpleFoam/RAS/wingMotion/wingMotion2D_simpleFoam/system/extrudeMeshDict /opt/OpenFOAM/OpenFOAM-v2012/tutorials/incompressible/overSimpleFoam/aeroFoil/aeroFoil_overset/system/extrudeMeshDict /opt/OpenFOAM/OpenFOAM-v2012/tutorials/incompressible/overSimpleFoam/aeroFoil/background_overset/system/extrudeMeshDict /opt/OpenFOAM/OpenFOAM-v2012/tutorials/incompressible/overPimpleDyMFoam/cylinder/cylinderMesh/system/extrudeMeshDict /opt/OpenFOAM/OpenFOAM-v2012/tutorials/mesh/moveDynamicMesh/relativeMotion/box2D_moveDynamicMesh/system/extrudeMeshDict (以下省略) |
適当なチュートリアルからsystemにコピーします。
|
1 |
cp -r $FOAM_TUTORIALS/incompressible/overSimpleFoam/aeroFoil/aeroFoil_overset/system/extrudeMeshDict system/ |
「system/extrudeMeshDict」を編集します。
system/extrudeMeshDict
|
1 2 3 4 5 6 7 8 9 10 11 12 13 14 15 16 17 18 19 20 21 22 23 24 25 26 27 28 29 30 31 32 33 34 35 36 37 38 39 40 41 42 43 44 45 46 47 48 49 50 51 52 |
/*--------------------------------*- C++ -*----------------------------------*\ | ========= | | | \\ / F ield | OpenFOAM: The Open Source CFD Toolbox | | \\ / O peration | Version: v2012 | | \\ / A nd | Website: www.openfoam.com | | \\/ M anipulation | | \*---------------------------------------------------------------------------*/ FoamFile { version 2.0; format ascii; class dictionary; object extrudeMeshDict; } // * * * * * * * * * * * * * * * * * * * * * * * * * * * * * * * * * * * * * // // What to extrude: // patch : from patch of another case ('sourceCase') // mesh : as above but with original case included // surface : from externally read surface constructFrom patch; sourceCase "."; sourcePatches (front); // If construct from patch: patch to use for back (can be same as sourcePatch) exposedPatchName back; // Flip surface normals before usage. Valid only for extrude from surface or // patch. flipNormals false; //- Wedge extrusion of a single layer // with wedge patches on front and back extrudeModel wedge; sectorCoeffs { axisPt (0 0.01 0); axis (0 0 1); angle 2; // wedge assumes axial symmetry of angle/2 on each side } // Do front and back need to be merged? Usually only makes sense for 360 // degree wedges. mergeFaces false; //true; // Merge small edges. Fraction of bounding box. //mergeTol 1e-6; // * * * * * * * * * * * * * * * * * * * * * * * * * * * * * * * * * * * * * // |
- axisPt (x y z); 対称軸上の点を定義
- axis (X Y Z); 対称軸のベクトル
- angle A;メッシュをA度スイープ
以下のコマンドを実行します。
|
1 |
extrudeMesh |
ParaViewで確認するとこんな感じです。


不要な面を削除(createPatch)
元々blockMeshで6面のメッシュだったのが面「front」と「back」の面をくっつけたことによって「bottom」がなくなっています。
constant/polyMesh/boundaryを見ると、
|
1 2 3 4 5 6 7 8 9 10 11 12 13 14 15 16 17 18 19 20 21 22 23 24 25 26 27 28 29 30 31 32 33 34 35 36 37 38 39 40 41 42 43 |
6 ( inlet { type patch; nFaces 30; startFace 5870; } outlet { type patch; nFaces 30; startFace 5900; } sideWall { type wall; inGroups 1(wall); nFaces 100; startFace 5930; } bottom { type wall; inGroups 1(wall); nFaces 0; startFace 6030; } front { type wedge; inGroups 1(wedge); nFaces 3000; startFace 6030; } back { type wedge; inGroups 1(wedge); nFaces 3000; startFace 9030; } ) |
|
1 |
find $FOAM_TUTORIALS -name "createPatchDict" |
いくつか候補が出てきます。
|
1 2 3 4 5 6 7 |
/opt/OpenFOAM/OpenFOAM-v2012/tutorials/multiphase/potentialFreeSurfaceDyMFoam/oscillatingBox/system/createPatchDict /opt/OpenFOAM/OpenFOAM-v2012/tutorials/multiphase/interPhaseChangeDyMFoam/propeller/system/createPatchDict /opt/OpenFOAM/OpenFOAM-v2012/tutorials/multiphase/compressibleInterDyMFoam/laminar/sphereDrop/system/createPatchDict /opt/OpenFOAM/OpenFOAM-v2012/tutorials/multiphase/interIsoFoam/iobasin/system/createPatchDict /opt/OpenFOAM/OpenFOAM-v2012/tutorials/multiphase/MPPICInterFoam/twoPhasePachuka/system/createPatchDict /opt/OpenFOAM/OpenFOAM-v2012/tutorials/combustion/fireFoam/LES/smallPoolFire3D/system/createPatchDict (以下省略) |
適当なチュートリアルからコピーします。
|
1 |
cp -r $FOAM_TUTORIALS/multiphase/potentialFreeSurfaceDyMFoam/oscillatingBox/system/createPatchDict system/ |
「system/createPatchDict」を編集します。
編集と言ってもいらない面を消すだけなので特に設定するものはありません。
system/createPatchDict
|
1 2 3 4 5 6 7 |
pointSync false; // Patches to create. patches ( ); |
この状態で「createPatch」コマンドをすると以下のようなwarning(警告)が出ます。
|
1 2 3 4 5 6 7 8 9 10 11 12 13 |
> FOAM Warning : From virtual void Foam::wedgePolyPatch::calcGeometry(Foam::PstreamBuffers&) in file meshes/polyMesh/polyPatches/constraint/wedge/wedgePolyPatch.C at line 72 Wedge patch 'back' is not planar. At local face at (0.00983184 0.00982838 1.182) the normal (-0.0174296 -0.999848 0) differs from the average normal (-0.017452 -0.999848 6.89322e-21) by 5.00876e-10 Either correct the patch or split it into planar parts --> FOAM Warning : From virtual void Foam::wedgePolyPatch::calcGeometry(Foam::PstreamBuffers&) in file meshes/polyMesh/polyPatches/constraint/wedge/wedgePolyPatch.C at line 72 Wedge patch 'back' is not planar. At local face at (0.00983184 0.00982838 1.194) the normal (-0.0174296 -0.999848 0) differs from the average normal (-0.017452 -0.999848 6.89322e-21) by 5.00876e-10 Either correct the patch or split it into planar parts Reading "system/createPatchDict" |
コードを眺めると以下の部分を出力しているようです。
|
1 2 3 4 5 6 7 8 9 10 11 12 13 |
if (magAxis < SMALL) { FatalErrorInFunction << "wedge " << name() << " plane aligns with a coordinate plane." << nl << " The wedge plane should make a small angle (~2.5deg)" " with the coordinate plane" << nl << " and the pair of wedge planes should be symmetric" << " about the coordinate plane." << nl << " Normal of wedge plane is " << n_ << " , implied coordinate plane direction is " << centreNormal_ << exit(FatalError); } |
良くわかりませんがいかのように対処するとwarningは消えるようです。
|
1 |
writeFormat binary; //ascii; |
よくわかりませんがwdgeでのwarning見たいですが、バイナリ形式での出力にするとwarningがなくなります・・・・
以下のコマンドでcreatePatchを実行します。
|
1 |
createPatch -overwrite |
constant/polyMesh/boundaryを見ると、
|
1 2 3 4 5 6 7 8 9 10 11 12 13 14 15 16 17 18 19 20 21 22 23 24 25 26 27 28 29 30 31 32 33 34 35 36 |
5 ( inlet { type patch; nFaces 30; startFace 5870; } outlet { type patch; nFaces 30; startFace 5900; } sideWall { type wall; inGroups 1(wall); nFaces 100; startFace 5930; } front { type wedge; inGroups 1(wedge); nFaces 3000; startFace 6030; } back { type wedge; inGroups 1(wedge); nFaces 3000; startFace 9030; } ) |
面「bottom」が消えて面の数が5つになっているのが確認できます。
|
1 |
メッシュ品質の確認
最終的なメッシュはこんな感じです。


以下のコマンドでメッシュ品質も確認しておきましょう。
|
1 |
checkMesh |
|
1 2 3 4 5 6 7 8 9 10 11 12 13 14 15 16 17 18 19 20 21 22 23 24 25 26 27 28 29 30 31 32 33 34 35 36 37 38 39 40 41 42 43 44 45 46 47 48 49 50 51 52 53 54 55 56 57 58 59 60 61 |
Mesh stats points: 6161 internal points: 0 faces: 12030 internal faces: 5870 cells: 3000 faces per cell: 5.96667 boundary patches: 5 point zones: 0 face zones: 0 cell zones: 0 Overall number of cells of each type: hexahedra: 2900 prisms: 100 wedges: 0 pyramids: 0 tet wedges: 0 tetrahedra: 0 polyhedra: 0 Checking topology... Boundary definition OK. Cell to face addressing OK. Point usage OK. Upper triangular ordering OK. Face vertices OK. Number of regions: 1 (OK). Checking patch topology for multiply connected surfaces... Patch Faces Points Surface topology inlet 30 61 ok (non-closed singly connected) outlet 30 61 ok (non-closed singly connected) sideWall 100 202 ok (non-closed singly connected) front 3000 3131 ok (non-closed singly connected) back 3000 3131 ok (non-closed singly connected) Checking faceZone topology for multiply connected surfaces... No faceZones found. Checking basic cellZone addressing... No cellZones found. Checking geometry... Overall domain bounding box (-3.02751e-20 0.00982548 0) (0.00999848 0.0101745 1.2) Mesh has 2 geometric (non-empty/wedge) directions (1 0 1) Mesh has 3 solution (non-empty) directions (1 1 1) Wedge front with angle 1 degrees Wedge back with angle 1 degrees All edges aligned with or perpendicular to non-empty directions. Boundary openness (-1.03046e-15 -6.03132e-17 1.98308e-20) OK. Max cell openness = 2.13316e-16 OK. Max aspect ratio = 72.011 OK. Minimum face area = 1.93886e-09. Maximum face area = 4.18858e-06. Face area magnitudes OK. Min volume = 2.32663e-11. Max volume = 1.37271e-09. Total volume = 2.09397e-06. Cell volumes OK. Mesh non-orthogonality Max: 0 average: 0 Non-orthogonality check OK. Face pyramids OK. Max skewness = 0.332927 OK. Coupled point location match (average 0) OK. |
軸対称のモデルだとメッシュ数が1万くらいなのでめちゃくちゃ軽いモデルですね。
直交性も良いですし。
以下の部分は最低確認するようにしましょう。
- Max aspect ratio:アスペクト比(縦横の比率)→境界層で大きくなりやすいので大きすぎる場合は確認
- non-orthogonality:直交性→70°以上であれば修正
- Max skewness:歪度→4以上だと修正
メッシュ品質の基準は以下のファイルにも記載がありますで確認してみましょう。
|
1 |
$WM_PROJECT_DIR/src/OpenFOAM/meshes/primitiveMesh/primitiveMeshCheck/ |
コマンドでファイルを探す場合は、
|
1 |
find $FOAM_SRC -name "primitiveMeshCheck*" |
以下のように出力されます。
|
1 2 3 4 5 6 7 |
/opt/OpenFOAM/OpenFOAM-v2012/src/OpenFOAM/lnInclude/primitiveMeshCheckEdgeLength.C /opt/OpenFOAM/OpenFOAM-v2012/src/OpenFOAM/lnInclude/primitiveMeshCheckPointNearness.C /opt/OpenFOAM/OpenFOAM-v2012/src/OpenFOAM/lnInclude/primitiveMeshCheck.C /opt/OpenFOAM/OpenFOAM-v2012/src/OpenFOAM/meshes/primitiveMesh/primitiveMeshCheck /opt/OpenFOAM/OpenFOAM-v2012/src/OpenFOAM/meshes/primitiveMesh/primitiveMeshCheck/primitiveMeshCheckEdgeLength.C /opt/OpenFOAM/OpenFOAM-v2012/src/OpenFOAM/meshes/primitiveMesh/primitiveMeshCheck/primitiveMeshCheckPointNearness.C /opt/OpenFOAM/OpenFOAM-v2012/src/OpenFOAM/meshes/primitiveMesh/primitiveMeshCheck/primitiveMeshCheck.C |
primitiveMeshCheck.Cの中身を確認しましょう。
|
1 |
vi $FOAM_SRC/OpenFOAM/meshes/primitiveMesh/primitiveMeshCheck/primitiveMeshCheck.C |
該当箇所は「/primitiveMesh」と打って「n(下へ)」「shift + n(上へ)」で探すことができます。
viを終了するには
ESCボタンを押して「:q」か「:q!」で終了することができます。
|
1 2 3 4 5 |
Foam::scalar Foam::primitiveMesh::closedThreshold_ = 1.0e-6; Foam::scalar Foam::primitiveMesh::aspectThreshold_ = 1000; Foam::scalar Foam::primitiveMesh::nonOrthThreshold_ = 70; // deg Foam::scalar Foam::primitiveMesh::skewThreshold_ = 4; Foam::scalar Foam::primitiveMesh::planarCosAngle_ = 1.0e-6; |
シミュレーションを行う場合、低品質なセルや面によって生じる数値誤差を低減できる数値スキームを選択します。
おすすめ参考図書
☟こちらは、OpenFOAMの日本語書籍が無い中唯一わかりやすい参考書だと思います。
☟こちらもOpenFOMの古いバージョンでの和訳になります。さすがにこちらはバージョンに対する日本語でのケアはしていないので、OpenFOAMに慣れている方は購入しても良いかと思います。僕は「日本語でまとまっている内容」なので少し重宝しています。
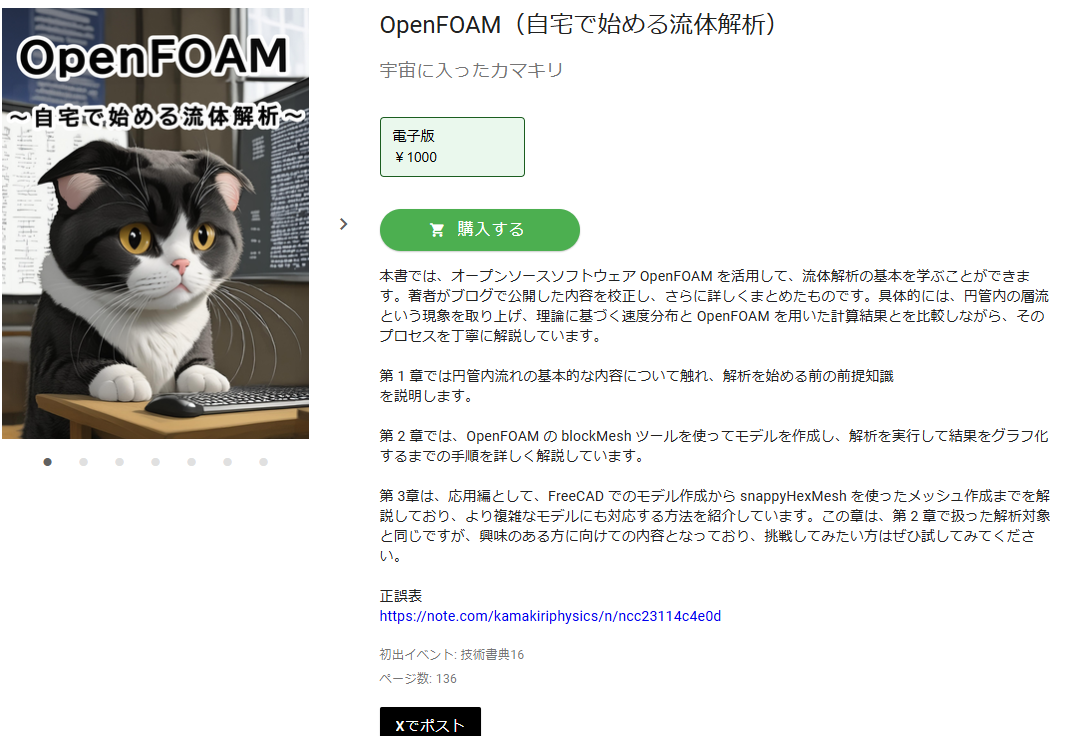
☟以下に、もっと初心者向けの同人誌を紹介しておきます。
初心者は「ってか、まずどうやってOpenFOAMをインストールするの?」というところからつまずきがちです。
そんな時は、以下の書籍をおすすめします。
インストール方法とチュートリアルで流体解析を体験・・・ちょっと高度な解析まで解説があります。著者曰くOpenFOAMのバージョンの追跡を行いながら、書籍をアップデートするようなので安心ですね。
