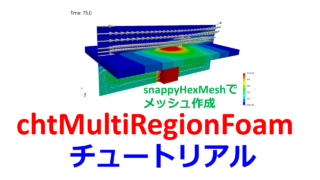
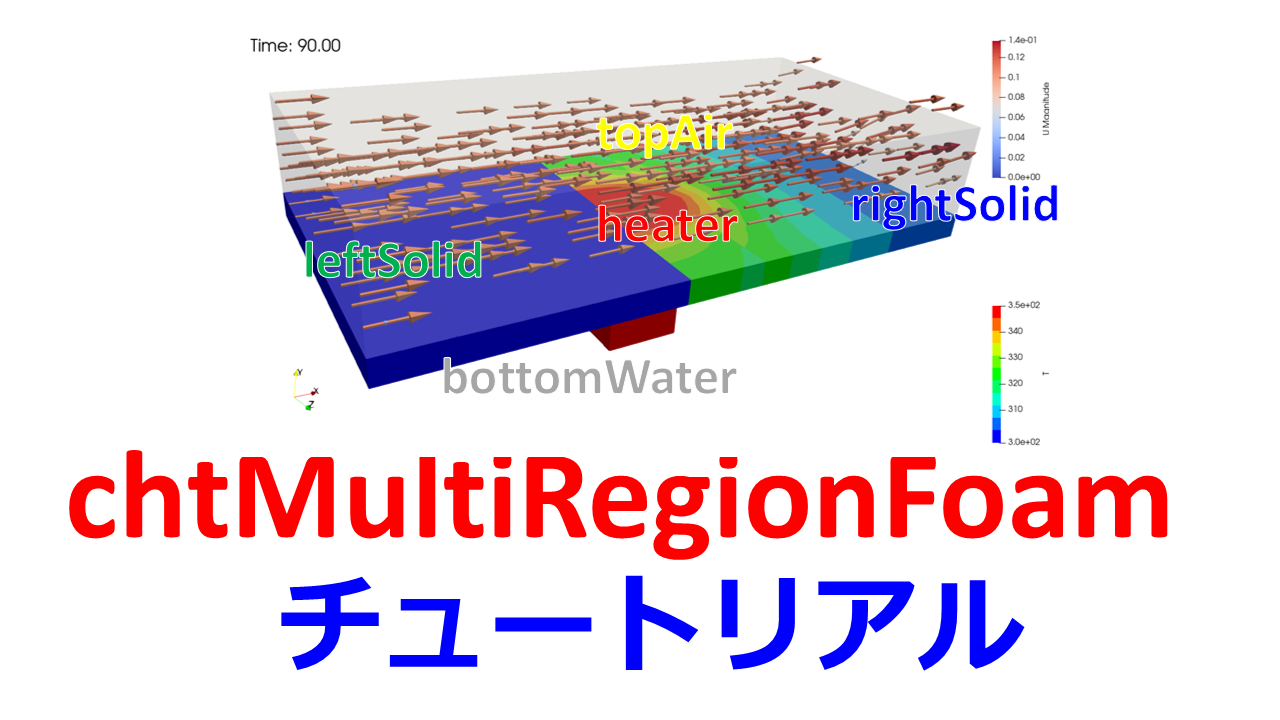
OpenFOAMの熱流体固体連成のチュートリアル(multiRegionHeater)
こんにちは(@t_kun_kamakiri)
OpenFOAMの熱流体固体連成のチュートリアルの解説を行います。
熱流体と熱伝導による固体の温度変化を解くソルバーを使います。
OpenFOAMv2036
熱流体固体連成のソルバ
今回は使うのは以下のようなソルバーです。
- chtMultiRegionFoam
- chtMultiRegionSimpleFoam
- chtMultiRegionTwoPhaseEulerFoam
chtMultiRegionFoamとchtMultiRegionSimpleFoamの違いはSimpleFoamと付いている方が定常解析用です。
本記事では非定常解析のchtMultiRegionFoamを使います。
チュートリアルをコピーする
チュートリアルをコピーします。
|
1 |
cp -r $FOAM_TUTORIALS/heatTransfer/chtMultiRegionFoam/multiRegionHeater . |
$FOAM_TUTORIALS = /usr/lib/openfoam/openfoam2306/tutorials
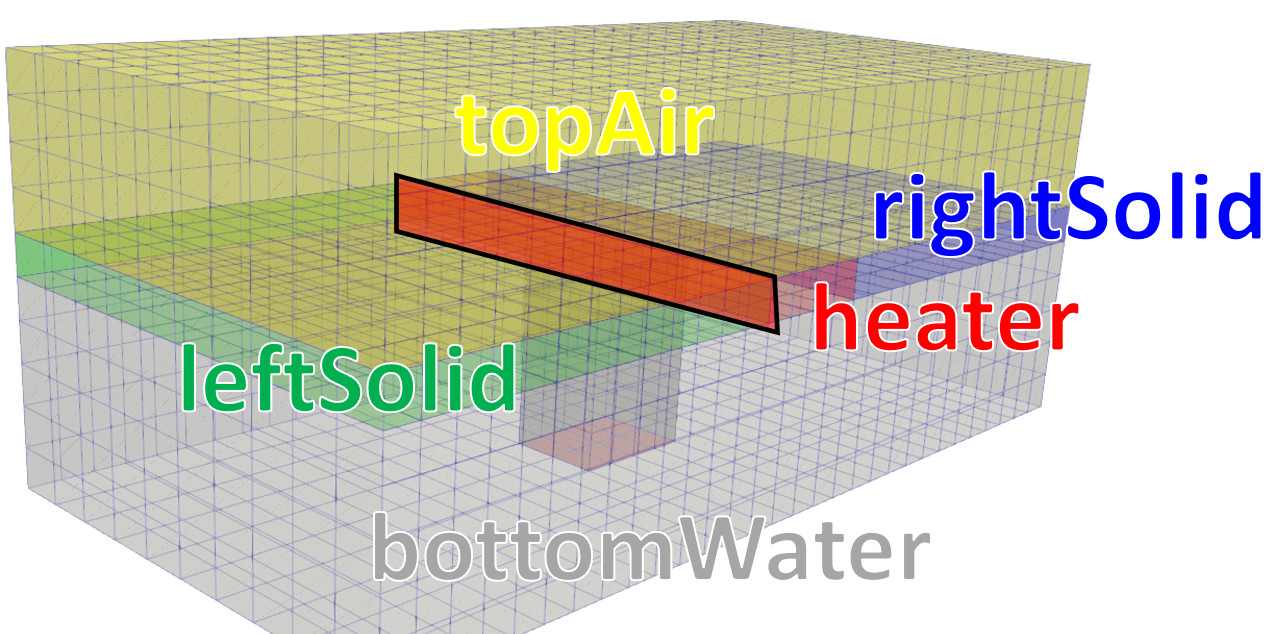
chtMultiRegionFoamのフォルダ構成は特殊で各領域ごとに設定を用意する必要があります。
Allrunスクリプトを確認する
チュートリアルにはAllrunスクリプトが用意されているので、スクリプトの内容を確認すると必要な手順というのがわかります。
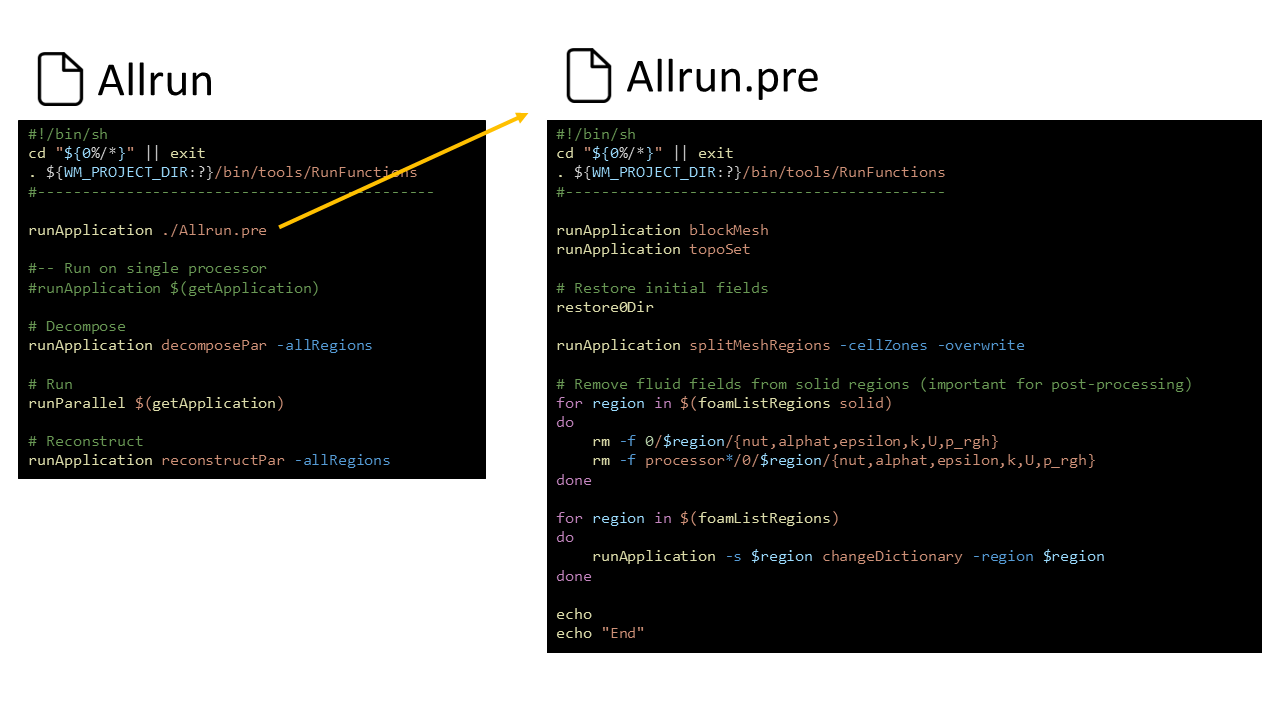
Allrun
|
1 2 3 4 5 6 7 8 9 10 11 12 13 14 15 16 17 18 19 20 |
#!/bin/sh cd "${0%/*}" || exit # Run from this directory . ${WM_PROJECT_DIR:?}/bin/tools/RunFunctions # Tutorial run functions #------------------------------------------------------------------------------ runApplication ./Allrun.pre #-- Run on single processor #runApplication $(getApplication) # Decompose runApplication decomposePar -allRegions # Run runParallel $(getApplication) # Reconstruct runApplication reconstructPar -allRegions #------------------------------------------------------------------------------ |
Allrunファイルは全体のスクリプトなので、以下のコマンドをターミナルに打ち計算を実行します。
|
1 |
./Allrun |
これでメッシュ作成➡解析設定➡ソルバ実行まで行ってくれます。
Allrun.preの確認
AllrunスクリプトははじめにAlrun.preを実行しているため、Alrun.preからまずは確認することになります。
Allrun.pre
|
1 2 3 4 5 6 7 8 9 10 11 12 13 14 15 16 17 18 19 20 21 22 23 24 25 26 27 28 29 |
#!/bin/sh cd "${0%/*}" || exit # Run from this directory . ${WM_PROJECT_DIR:?}/bin/tools/RunFunctions # Tutorial run functions #------------------------------------------------------------------------------ runApplication blockMesh runApplication topoSet # Restore initial fields restore0Dir runApplication splitMeshRegions -cellZones -overwrite # Remove fluid fields from solid regions (important for post-processing) for region in $(foamListRegions solid) do rm -f 0/$region/{nut,alphat,epsilon,k,U,p_rgh} rm -f processor*/0/$region/{nut,alphat,epsilon,k,U,p_rgh} done for region in $(foamListRegions) do runApplication -s $region changeDictionary -region $region done echo echo "End" #------------------------------------------------------------------------------ |
解析の設定を理解するために、設定ファイルをはじめの状態に戻しておきます。
|
1 |
./Allclean |
これで初期化されます。
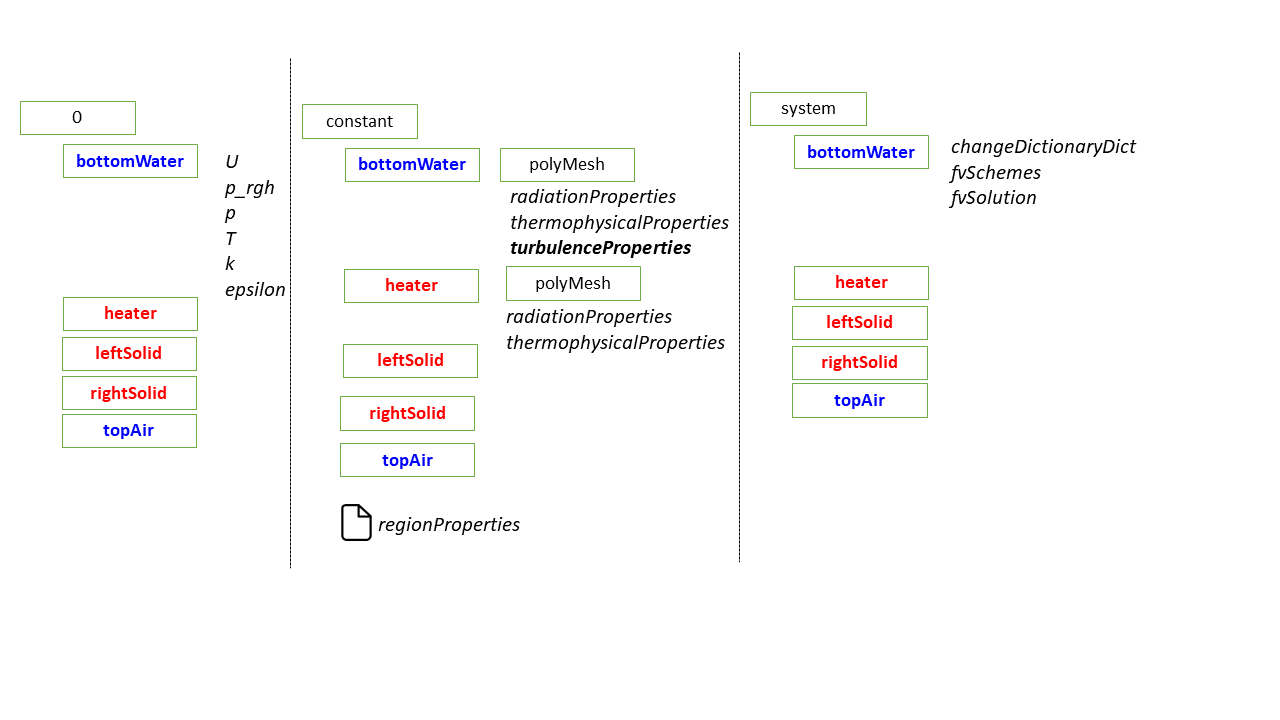
初期設定のフォルダ構成
|
1 2 3 4 5 6 7 8 9 10 11 12 13 14 15 16 17 18 19 20 21 22 23 24 25 26 27 28 29 30 31 32 33 34 35 36 37 38 39 40 41 42 43 44 45 46 47 48 49 50 51 52 53 54 55 56 57 58 59 60 61 62 63 64 65 66 67 |
$ tree . ├── 0.orig │ ├── T │ ├── U │ ├── epsilon │ ├── k │ ├── p │ └── p_rgh ├── Allclean ├── Allrun ├── Allrun.pre ├── README.md ├── constant │ ├── bottomWater │ │ ├── radiationProperties │ │ ├── thermophysicalProperties │ │ └── turbulenceProperties │ ├── g │ ├── heater │ │ ├── radiationProperties │ │ └── thermophysicalProperties │ ├── leftSolid │ │ ├── radiationProperties -> ../heater/radiationProperties │ │ └── thermophysicalProperties -> ../heater/thermophysicalProperties │ ├── regionProperties │ ├── rightSolid │ │ ├── radiationProperties -> ../heater/radiationProperties │ │ └── thermophysicalProperties -> ../heater/thermophysicalProperties │ └── topAir │ ├── radiationProperties -> ../bottomWater/radiationProperties │ ├── thermophysicalProperties │ └── turbulenceProperties -> ../bottomWater/turbulenceProperties └── system ├── README ├── blockMeshDict ├── bottomWater │ ├── changeDictionaryDict │ ├── decomposeParDict -> ../decomposeParDict │ ├── fvSchemes │ └── fvSolution ├── controlDict ├── decomposeParDict ├── fvSchemes ├── fvSolution ├── heater │ ├── changeDictionaryDict │ ├── decomposeParDict -> ../decomposeParDict │ ├── fvSchemes │ └── fvSolution ├── leftSolid │ ├── changeDictionaryDict │ ├── decomposeParDict -> ../decomposeParDict │ ├── fvSchemes -> ../heater/fvSchemes │ └── fvSolution ├── rightSolid │ ├── changeDictionaryDict │ ├── decomposeParDict -> ../decomposeParDict │ ├── fvSchemes -> ../heater/fvSchemes │ └── fvSolution ├── topAir │ ├── changeDictionaryDict │ ├── decomposeParDict -> ../decomposeParDict │ ├── fvSchemes -> ../bottomWater/fvSchemes │ └── fvSolution ├── topoSetDict └── vtkWrite |
blockMeshでメッシュ作成
blockMeshを実行します。
|
1 2 3 4 5 6 7 8 9 10 11 12 13 14 15 16 17 18 19 20 21 22 23 24 25 26 27 28 29 30 31 32 33 34 35 36 37 38 39 40 41 42 43 44 45 46 47 48 49 50 51 52 53 54 55 56 57 58 59 60 61 62 63 64 65 66 67 68 69 70 71 72 73 74 75 76 77 78 |
scale 1; vertices ( (-0.1 -0.04 -0.05) ( 0.1 -0.04 -0.05) ( 0.1 0.04 -0.05) (-0.1 0.04 -0.05) (-0.1 -0.04 0.05) ( 0.1 -0.04 0.05) ( 0.1 0.04 0.05) (-0.1 0.04 0.05) ); blocks ( hex (0 1 2 3 4 5 6 7) (30 10 10) simpleGrading (1 1 1) ); edges ( ); boundary ( maxY { type wall; faces ( (3 7 6 2) ); } minX { type patch; faces ( (0 4 7 3) ); } maxX { type patch; faces ( (2 6 5 1) ); } minY { type wall; faces ( (1 5 4 0) ); } minZ { type wall; faces ( (0 3 2 1) ); } maxZ { type wall; faces ( (4 5 6 7) ); } ); mergePatchPairs ( ); |
以下のコマンドでベースメッシュを作成します。
|
1 |
blockMesh |